

Today I am showing you this tutorial that I have done for the Joanna Sheen Challenge blog, now I know many of you may already know how to make these lace rosettes, but I do know there are new crafters coming to blogland all the time, and might want to make something a little different to embellish their creations.

Here is what you need:-
Needle and Thread
Buttons
Lace - the wider lace is 24" long and the narrower lace is 16" long

Thread your needle and knot your thread, then start threading along the top of the lace.
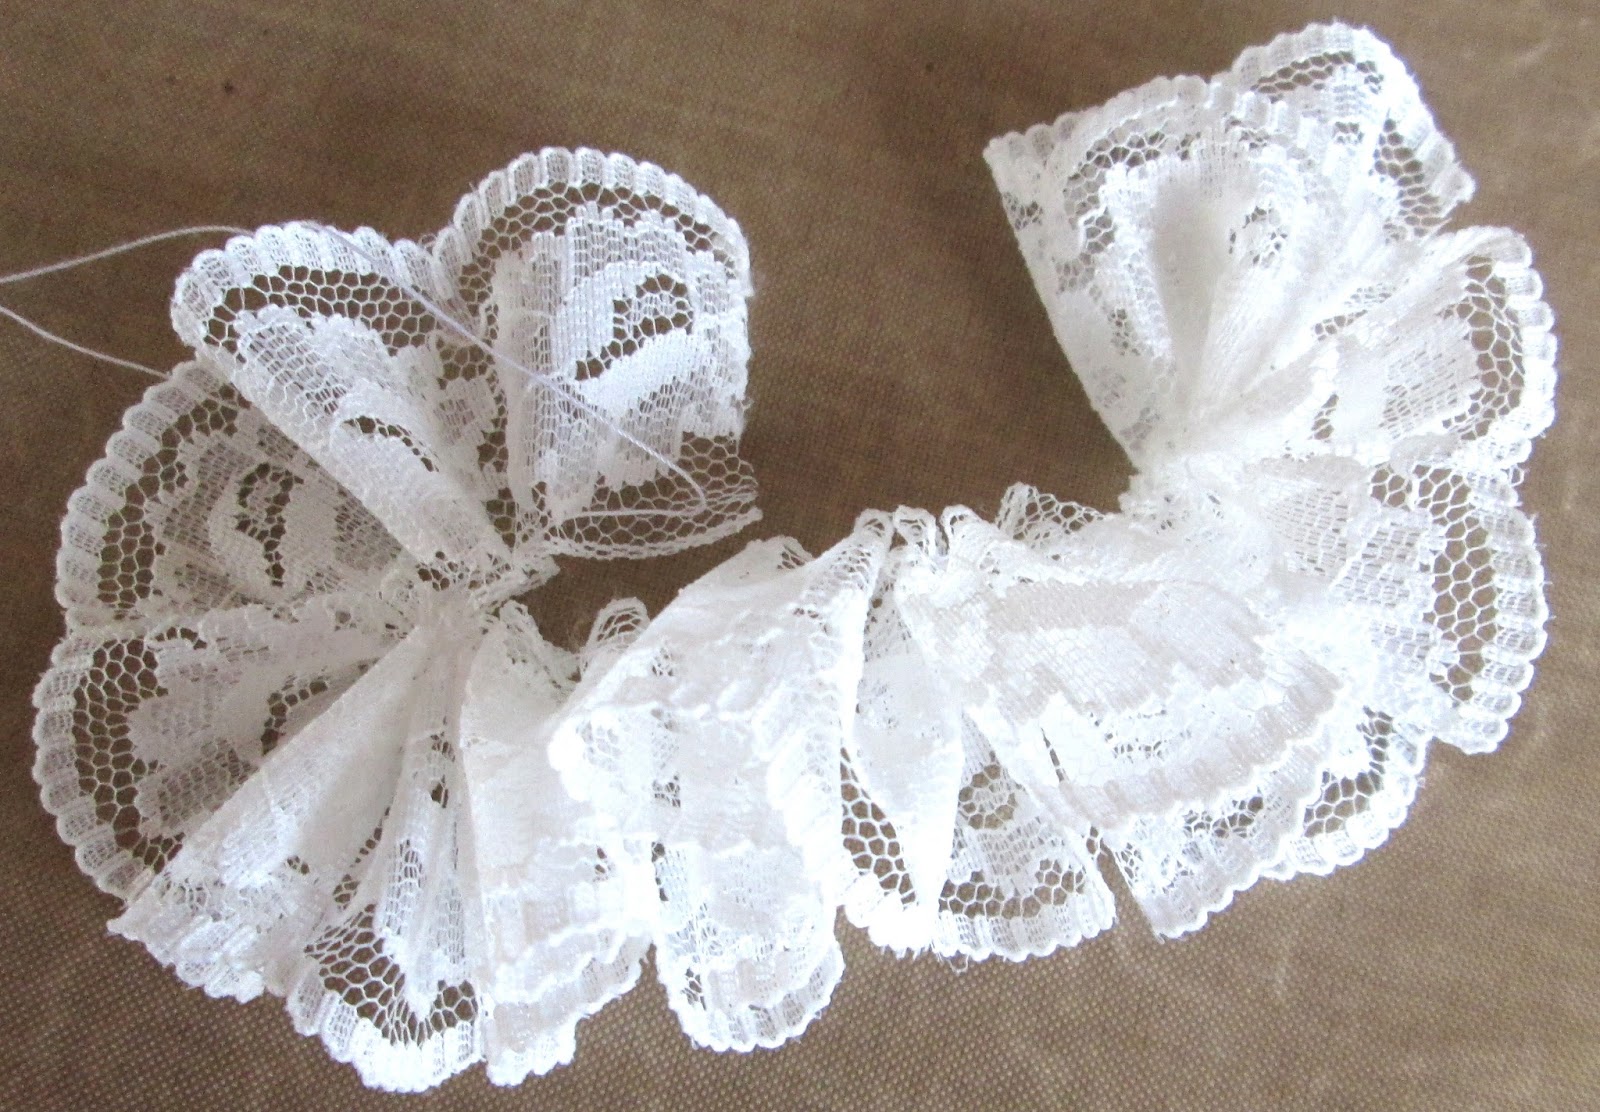
Get to the end of your lace and pull the thread to gather up the lace, then tie it off.

I always tidy up the cut edges by stitching them together, this is optional as you can hide it underneath each other.

It should look like this, insert the hoop on the back of the button through the centre and stitch through to attach. The wider the lace the bigger the rosette, but they are all made in the same way, this is how I used my Rosette:-
On a card made using the Shirley Barber Project Book from Joanna Sheen

Hope this has given you an idea for an embellishment to use.
Happy crafting
Tracy x
A great tutorial Tracy, the lace flower is so very delicate and makes a beautiful embellishment which works beautifully with the soft pastel colours of the image.
ReplyDeleteHope you enjoy the rest of the bank holiday weekend.
B x
This is sooo pretty Tracy!!
ReplyDeleteLove it!
♥ Hugs, Inger
Look gorgeous Tracy, so pretty made with lace but I could imagine ribbon too. xxxx
ReplyDeleteReally gorgeous! Thanks for sharing this Tracy! HUGS
ReplyDeleteGreat tutorial :)
ReplyDeleteYour rosette is so so pretty :)
Thank you for tutorial. Your rosette is so beautiful and so is the card. Love it!
ReplyDeleteEret x
So pretty Tracy and the little centre button finishes it off beautifully.
ReplyDeleteShirley